Activation of Anonymised audiences in Pubmatic Media Buyer Console
Deployment steps
Build and then activate an audience in Anonymised’s Audience Builder.

Active Segments
Once activated, you can send the segment to Pubmatic to build the deal. The Audience Builder will display the segment details and your Pubmatic Seat ID.

Pubmatic Seat
Note that on activation, the segment will need to be manually sent to the SSP. Segments are uploaded daily by our operations team and then assigned to the appropriate buyer seats. Please contact your Customer Success Manager or support should you need to expedite segment availability or if there is a delay in the segment appearing in Pubmatic.
You may check that you have access to the segment in the Pubmatic Media Buyer Console by: -
Selecting the menu option Audience and then under My Audience selecting the sub menu option Audiences.
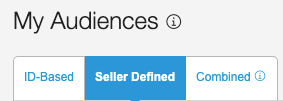
Click on Seller Defined.
Seller Defined Audiences
Search for the audience using the Find, Status and Segtax options available. Note that the Anonymised segtax is 1000.
To build a Pubmatic deal using an Anonymised segment:
Navigate to Deals > General Deals.
Click on the Create Auction Package Deal button. Alternatively, tick the box next to an existing deal and click on the Duplicate option. If copying a deal, you will of course need to modify it before activating it.
Configuration pageName the deal and choose if you are curating a deal based on another deal - deal bundling - see Pubmatic help.
Set up the flight times for the PMP under Transaction Date. Note, unticking ‘ongoing’ will require an end date to be added. For housekeeping purposes, we would recommend setting an end date.
Select the DSPs/Buyer seats. Noting that it is more common to set this by buyer's seat.
Choose if adding a Transaction fee as a fixed or percentage fee of the media cost. Note that the Anonymised data fee should also be considered.
Choose the Auction Type from:
First price - this means the highest bid wins, and this bid price is submitted for the publisher auction.
Fixed price - meaning the bid price remains constant, usually used for PG or preferred deals.
Click on the Next button to proceed to the Inventory page. Noting that the button may appear disabled if fields have not been completed sufficiently.
InventorySelect the Bulk Upload option under Allowlist and upload the publishers you wish to include as inventory in the deal. Note that an example file template is also presented.
Leave the Integration Type option blank or only select the following:
Amazon TAM
Prebid 1.0
Prebid Server
PubMatic OpenWrap
Leave the Directness option blank or only select the option Publisher.
Under Environment, ensure you choose only the following and ensure that they are compatible with the buyer's media brief and expectations:
Media type - Banner and/or Video
Platforms - Desktop and/or Mobile Web
Ad Sizes - Any or specify the required sizes from those that are offered
Viewability - balancing viewability expectations with reach
Domains & Apps are usually left blank - meaning the deal with use all the inventory from the publishers selected in step i.
Click on the Next button to proceed to the Targeting page. Noting that the button may appear disabled if fields have not been completed sufficiently.
TargetingEnsure you click on the Audience tab and then use the filters to list the Anonymised segments. Appropriate filters are:
Seller Defined
Sources equals Anonymised SDA
Segtax equals Anonymised Custom Audience.
Choose the segment you wish to add and click on the Next button to proceed to the Summary page. Noting that the button may appear disabled if fields have not been completed sufficiently.
SummaryCheck the summary of the PMP deal and if you are not happy with any setting, use the Previous button to navigate back through the sections.
When you are satisfied with the PMP deal settings, click on the Create Auction Package button which appears on most pages, subject to the necessary fields having been completed sufficiently.
On most pages in the PMP deal builder, a forecasting tool will indicate the number of available impressions you should expect, based on a 30-day historical view of the criteria. Note that for new segments, this may not be the most reliable forecast available.